Nested generators
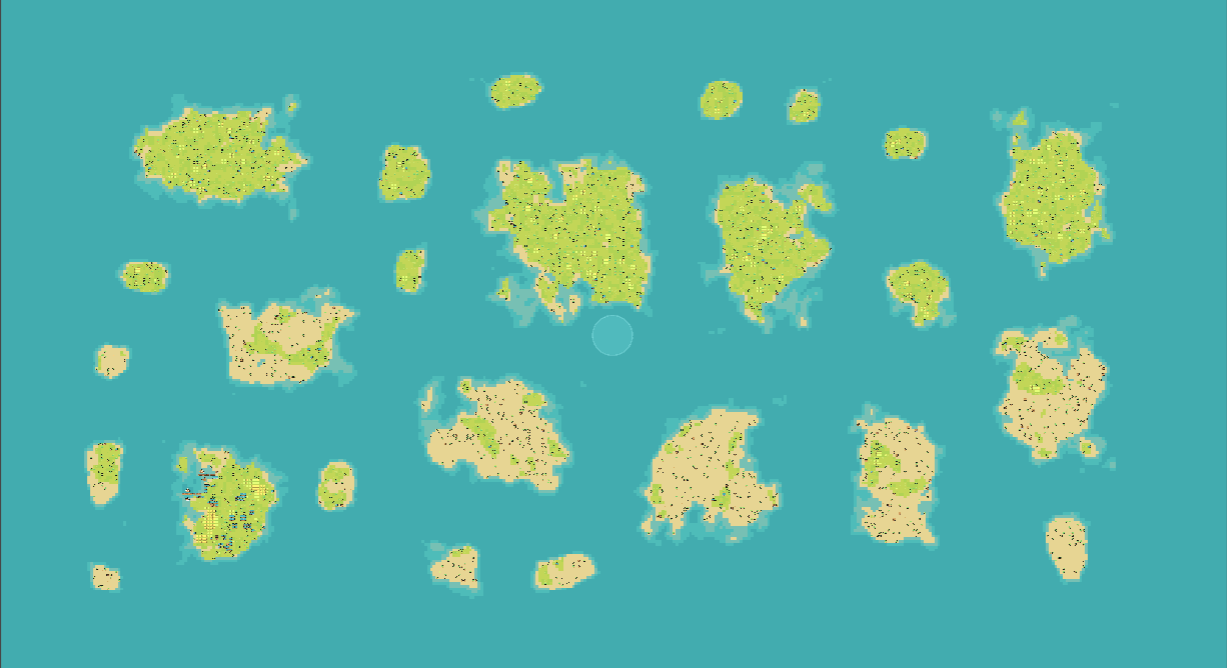
With Frigga, it is possible to call a generator from inside another generator. That makes it possible to create complex levels where different areas are generated by different generators. For example, in the image below, we can see a level where multiple islands are generated by different generators and placed inside a single level.
Overview
The Nested generators feature provides utilities for calling a generator from inside another generator and then merging the nested levels with the root level. The same utilities can also be used for placing a handmade level (via Level editor) into another level, similar to how structures are placed in a level, but completely controlled by the calling script.
Prerequisites
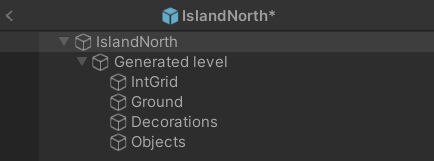
If we want to call one generator from another, we need to make sure that we have the nested generator available as a prefab. To create such a generator, create an empty prefab and add the generator component to the root of the prefab. After you generate a level, you should see that the Generated level object is created under the root/generator object.
Complete example
Here's a complete workflow showing how to use nested generators. This example demonstrates the typical pattern you'll follow when implementing nested generation:
// Create the nested generator runner
var nestedGeneratorRunner = new NestedGeneratorRunner(result);

// Create a copy of the nested generator prefab
var islandGenerator = nestedGeneratorRunner.InstantiateGenerator(generatorPrefab);

// Generate the nested level
var islandResult = nestedGeneratorRunner.Generate(islandGenerator);

// Place the nested level in the root level
nestedGeneratorRunner.InstantiateNestedLevel(islandResult, position);

// Clean up - disable the generator component
islandGenerator.enabled = false;
- Always use a new copy: Whenever a nested level is generated, we must use a new copy of the nested generator prefab via
InstantiateGenerator(). We must not use the original generator prefab, or use the same generator object for creating 2 different nested levels. - Avoid overlapping: The caller needs to make sure that nested levels do not overlap each other. Nested levels overwrite int grid tiles in their covered area. Biome-only cells are merged additively and do not clear existing int grid tile values.
Method reference
The Nested generators feature is expected to be used from inside a post-processor or from a custom generator. For both approaches, it is expected that we have access to the GeneratorResult object which contains the current level that is being generated.
NestedGeneratorRunner
The first step is to create an instance of the NestedGeneratorRunner class which provides all methods for working with nested generators:
var nestedGeneratorRunner = new NestedGeneratorRunner(result);
InstantiateGenerator()
Create a copy of the nested generator prefab:
var islandGenerator = nestedGeneratorRunner.InstantiateGenerator(generatorPrefab);
Generate()
Generate a nested level. The method has an overload that takes a seed to be used by the nested generator. Otherwise, a random seed is generated:
var islandResult = nestedGeneratorRunner.Generate(islandGenerator);
// Or with a specific seed:
var islandResult = nestedGeneratorRunner.Generate(islandGenerator, seed);
InstantiateNestedLevel()
After generating a level, it is not yet merged with the root level. We need to call the InstantiateNestedLevel() method and provide the position where the level should be placed:
nestedGeneratorRunner.InstantiateNestedLevel(islandResult, position);
Cleanup
As a final step, we can disable the nested generator component so that it doesn't appear in the generator overlay inside the editor:
islandGenerator.enabled = false;
Handmade levels
A very similar technique can be used for placing handmade (via Level editor) levels. This is particularly useful when you want to include pre-designed areas in your generated levels.
Workflow for handmade levels
The process is nearly identical to using generators, but instead of generating new content, you're placing existing handmade content:
// Place the hub island first
// It's important to call InstantiateLevelEditor to get a copy of the hub level editor prefab!
var hubLevelEditor = nestedGeneratorRunner.InstantiateLevelEditor(Hub);
var hubResult = hubLevelEditor.GeneratorResult;
var hubBounds = hubResult.Bounds;

// Get random bounds to place the hub
var hubPlacement = GetRandomBoundsInside(result.Bounds, new Vector2Int(hubBounds.size.x, hubBounds.size.y), random);
// The next line places the hub level inside the main level
nestedGeneratorRunner.InstantiateNestedLevel(hubResult, hubPlacement.position);
// Keep track of the hub bounds
boundsList.Add(hubPlacement);
// Disable the hub level editor to prevent it from showing up in the level editor overlay
hubLevelEditor.enabled = false;
Key differences
- Use
InstantiateLevelEditor()instead ofInstantiateGenerator() - The level content is already created (handmade), so no generation step is needed
- Access the existing level via
hubLevelEditor.GeneratorResult
Multi-island example
There is a Multi-island example scene inside the Examples/MultiIsland folder and the multi-island logic is implemented inside the FriggaMultiIslandPostProcessor post-processor. Please take a look at the post-processor if you want to see the nested generators in action.
The goal of the example is:
- generate an ocean filled with randomly placed islands
- use 2 different island generators - northern islands are more grassy while southern islands are more sandy
- use 2 different sizes of islands - place large islands first and then fill the rest with small islands
- always place a hub island which is a premade island and always looks the same
Please go and see the source code - it's heavily commented.