Tiles, biomes, perlin noise
In this guide, I want to show you how we can use int grid tiles and biomes to generate interesting levels.
Setup
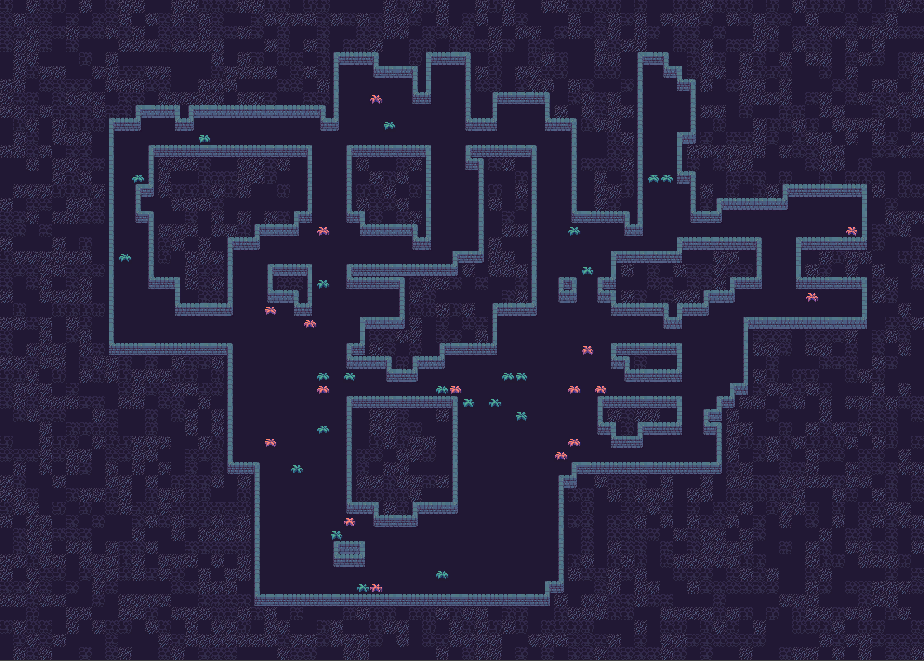
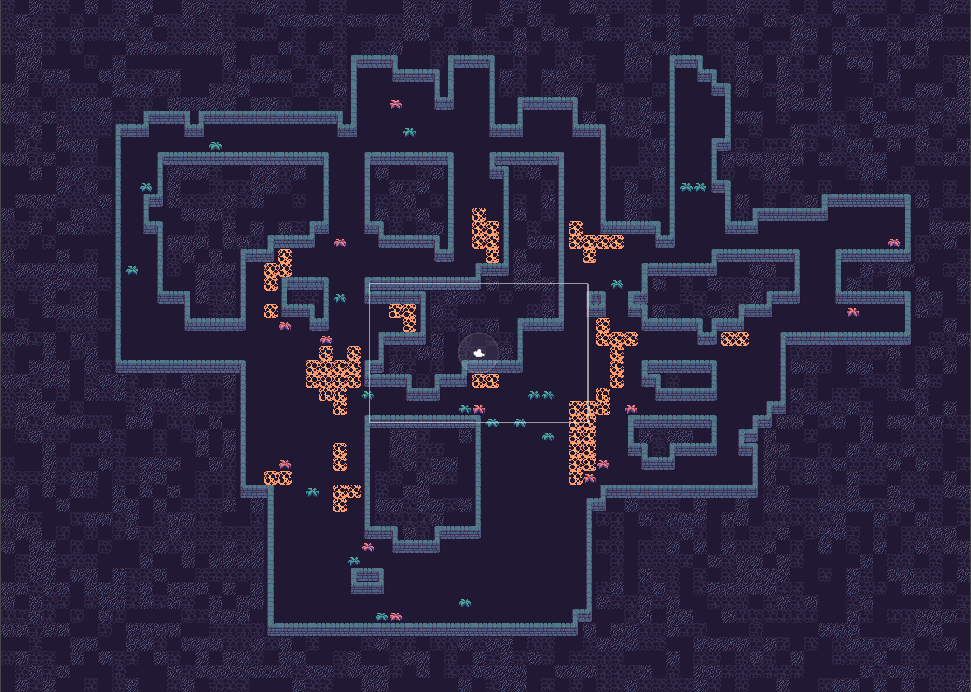
You can see the basic setup for this guide in the image below. I used the Walker generator with a Theme that has 2 tiles - Floor tile and a Wall tile. We will build on top of this setup in this guide.
Placing rocks
The first thing I want to achieve is to place some rocks in the level. So let's see how we can do it.
Probability rule control
The easiest way to place some rocks would be by using the Probability rule control where we can configure it so that the rule has a 10% probability of being placed on top of a Floor tile. While this approach is fine for some use cases, I would like the placement to be less uniform. I want there to be areas with more rocks and also areas with almost no rocks.

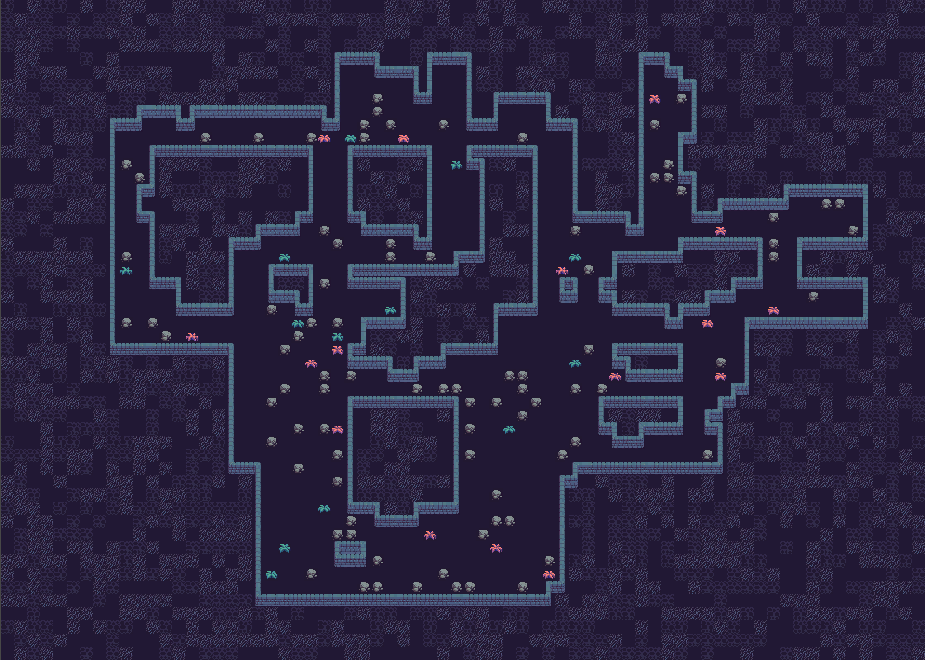
Perlin noise rule control
If we want to improve the placement, we can use the Perlin noise rule control. That way, we can have areas with more rocks and areas with almost no rocks.
In a real world scenario, it often makes sense to combine rules with pure probability and rules using Perlin noise. That way, we can have areas with many rocks based on Perlin noise but whenever the noise threshold is not met, we can still place rocks with a low probability across the whole level so that no area feels completely empty.
Perlin noise rule control, continued
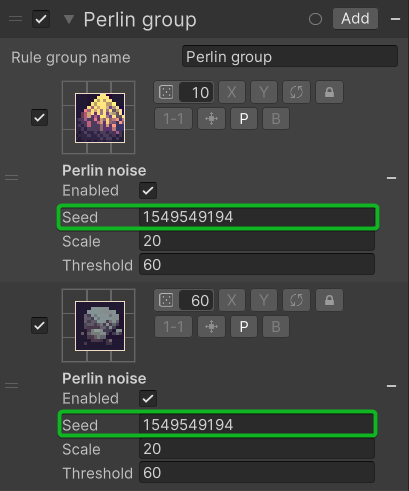
The Perlin noise rule control is a great way to quickly get some interesting placement of rules but let's see where it falls short. What if we wanted to add a rarer golden rock inside the rocky biome? The easiest solution would be duplicate the original rock tile rule and change the output and probability. That way we get another rule with the exact same Perlin noise configuration so both rules will be applied to the same area.
Biomes
While the previous approch could definitely work for a few rules, it can quickly get out of hand if we wanted to do anything complex. Moreover, what if we decided to change the parameters of the Perlin noise? We would have to go through all the rules and make sure the parameters are in sync. A better solution would be to use Biomes. Let's see how to do that.
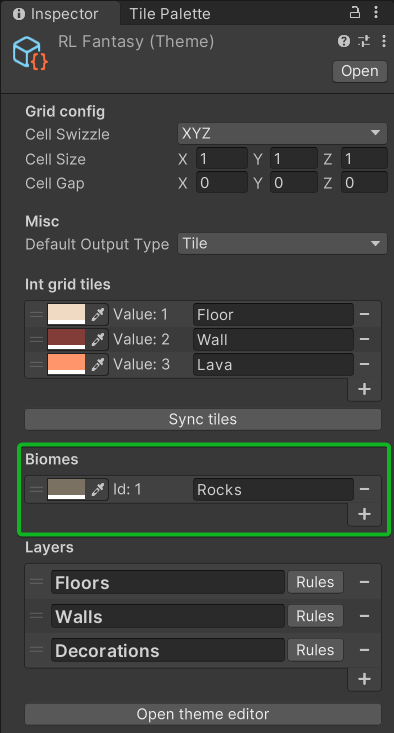
First, we need to add a new biome inside the Theme asset:
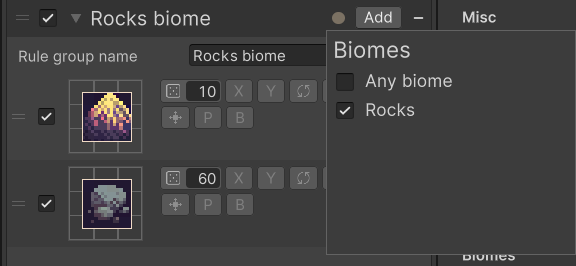
Then we create a new Rule group, add the rock tiles and set the Rule group to only be enabled when the biome is set to "Rocks":
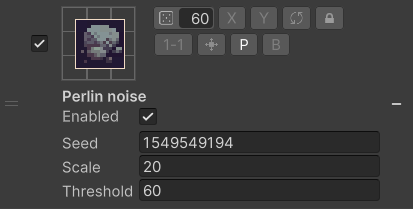
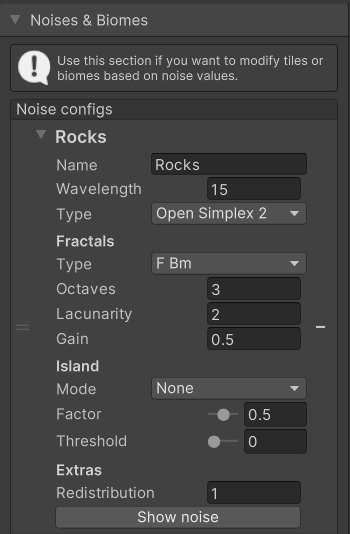
Instead of configuring the Perlin noise directly inside each rule, we now need to create a new noise inside the "Noise" section of the generator. Please check the Noise generator documentation to learn more about noises and how to use them.
This section might have a slightly different name in each generator. Some generators might not support it, but Walker and Noise generators do support it.
And finally, we have to map the noise to the "Rocks" biome. To do that, we need to create a Noise mapping condition which checks for specific values of the "Rocks" noise and if they are met, it sets the biome for a given tile to "Rocks".

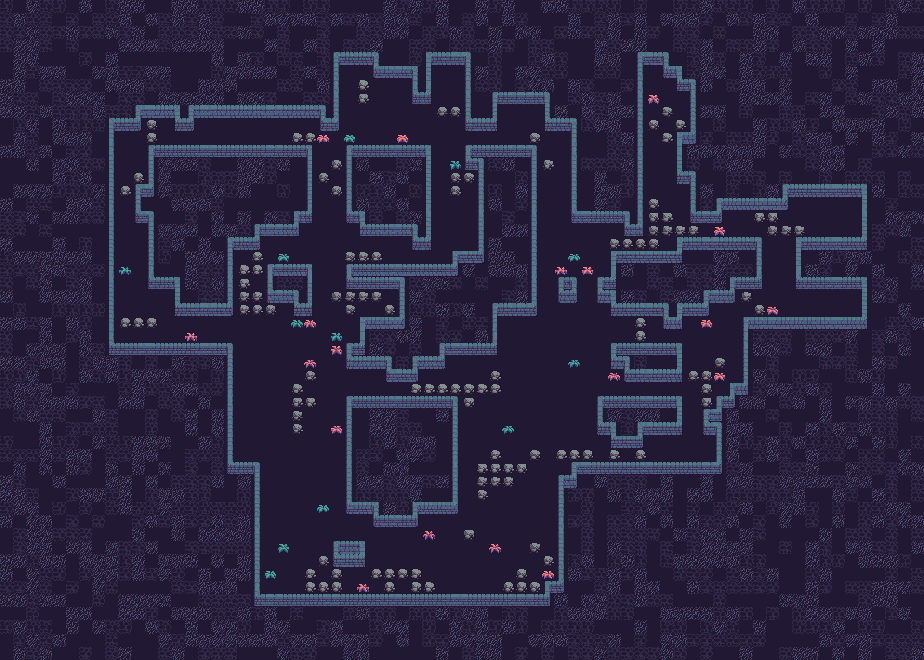
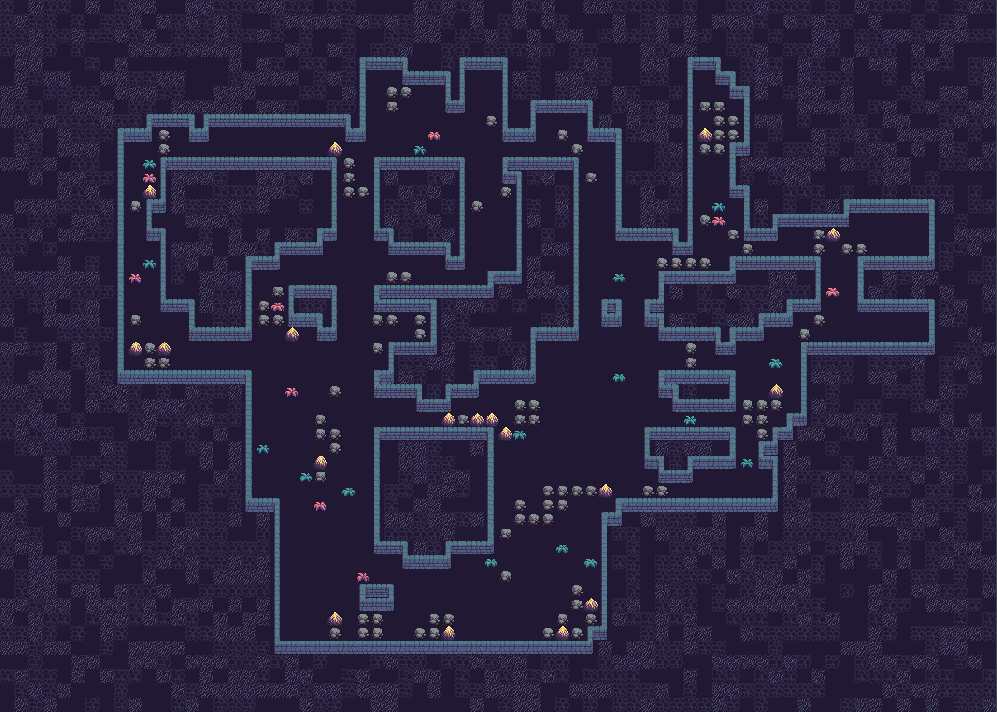
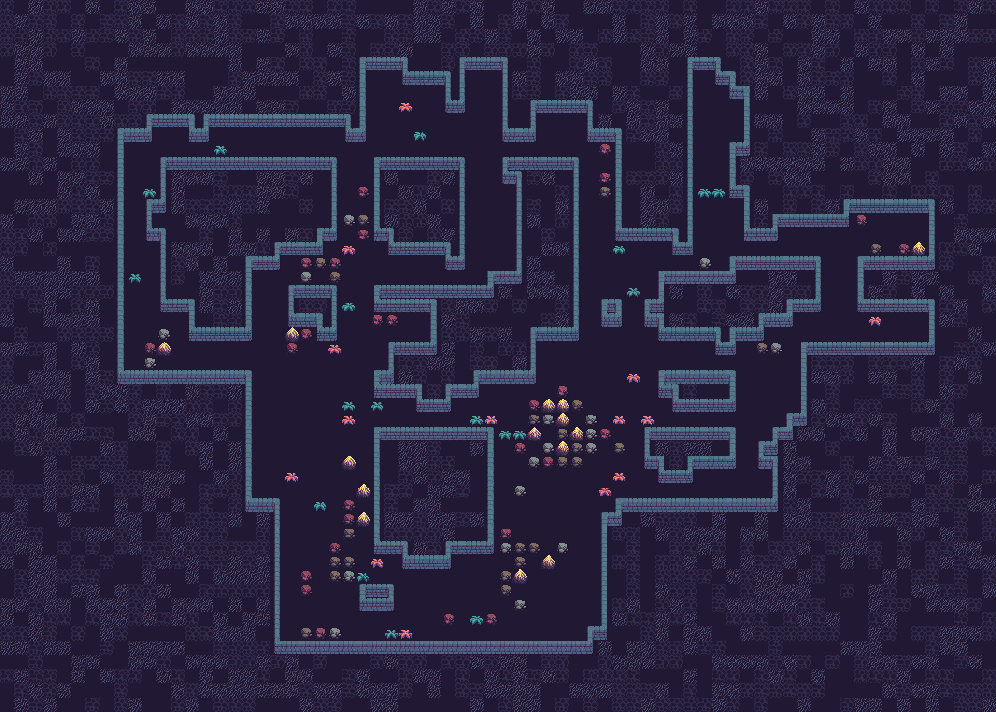
And here's the result. It's not exactly the same as the previous one but that's only because now we use a slightly different noise with a different configuration. This approach is, however, much more flexible than the previous one with the Perlin noise rule control. We now have the noise configured in a single place so we can define many rules for the biome, or even combine multiple biomes together.
Placing lava
In the second part of this guide, I want to show you how to place lava tiles using the Walker generator. By default, the Walker generator is able to place exactly 2 types of tiles - one that is walkable (usually a Floor tile) and one that is not walkable (usually a Floor tile). If we wanted to introduce a third type of tile - a lava tile - we could use the biomes feature as described in the previous section. However, there's also a different (and sometimes better) solution.
Lava tile setup
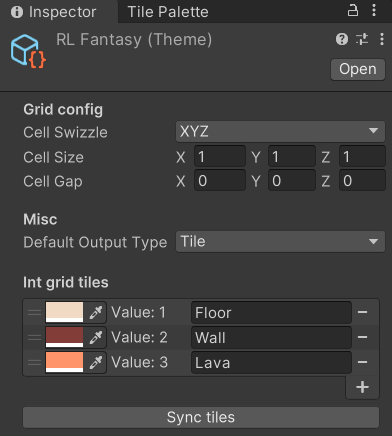
First, we need to add a Lava tile to the Theme asset:
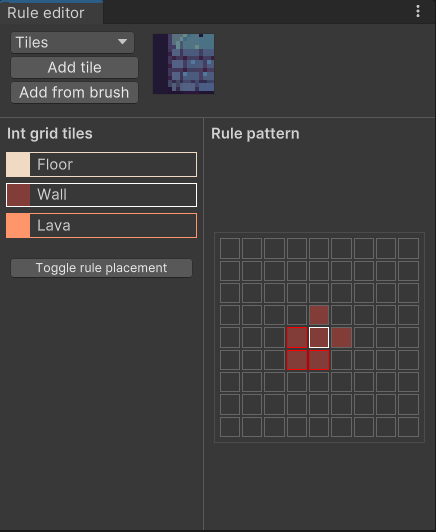
Next, we add a rule for the Lava tile:
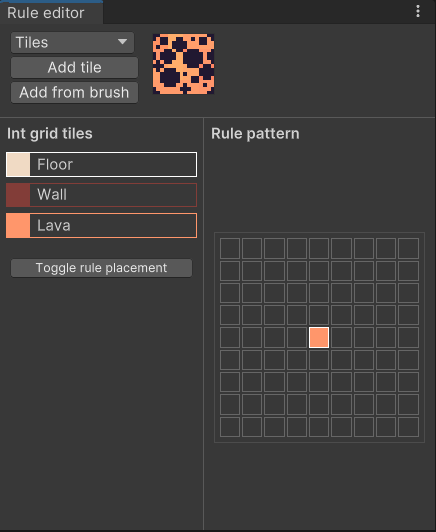
We also need to think about what happens when the Lava tile interacts with other tiles. For example, before making this rule, I had my wall rules configured like "If there is a floor tile next to a wall tile, use sprite X". This won't work anymore as there will be cases where there's lava next to the wall instead of floor. An easy fix is to use just "Wall" and "not Wall" tiles in the rule pattern, which is done by right clicking inside the rule pattern editor.
Lava tile via noise
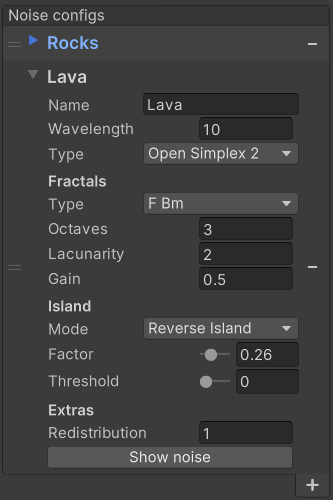
Now we can add a noise that we will use to place our lava tiles:
We also need a noise mapping condition to map the noise to the Lava tile:

Now we get a result like this:
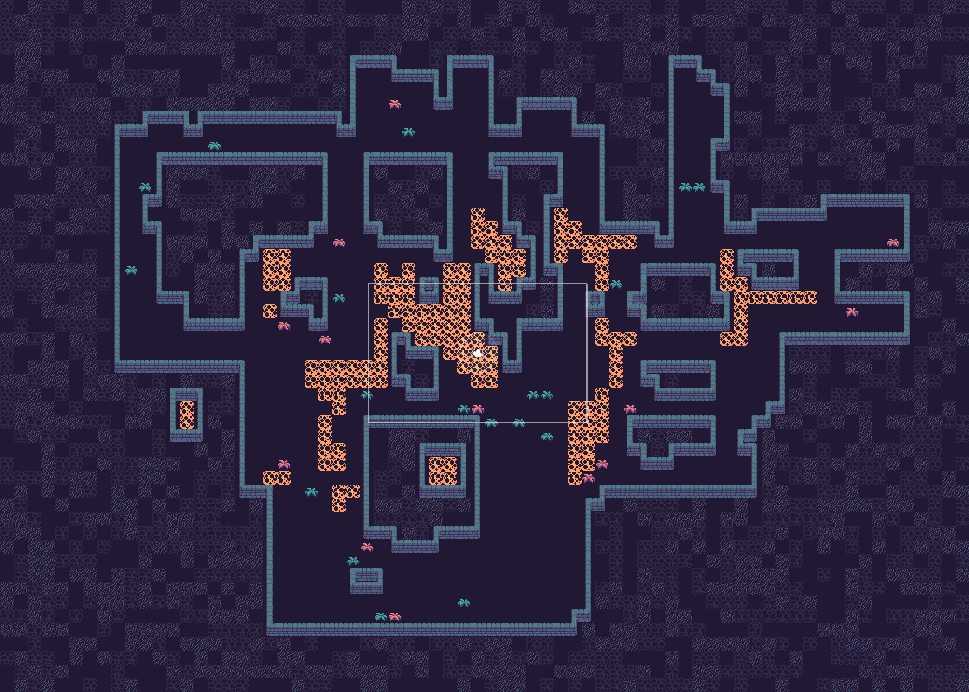
You can see in the picture that in the bottom left area of the level there is a disconnected lava area that is not connected to the rest of the level. If that's fine for us, we can just keep that. If we don't want it, we can slightly change the noise mapping condition so that the lava tile can be placed only if there was originally a floor tile:
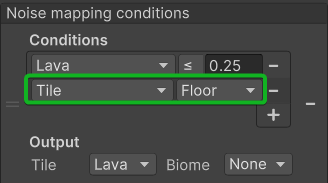
Now we can see that there are no disconnected lava areas:
Biomes vs Tiles
In some cases, it might be unclear whether to use Tiles or Biomes to achieve something. Let's look into it:
Biomes are great when you don't want to completely replace all the existing rules. For example, we might have special frozen tiles placed in a Frozen biome, but that might not prevent enemies or treasure to spawn on top of them. So that could be a good example for using a biome.
Tiles are great when we want a completely new set of rules. For example, for the lava tiles, we probably don't want to place decorations or vegetation on top of them, so it might be easier to achieve that with a new tile.
Unfortunately, the difference is not always so clear so you might need to experiment a bit to figure out what's best for you.